Bookbinding;
For my design for print I am planning on making a book, binding it myself and screen printing all of the pages inside it. I thought that screen printing all of the pages inside the book anyway would be quite time consuming and complicated, but also binding it myself will be hard. I thought about the pages and how they will be arranged, this will take planning before printing, therefore before designing the content for my print book I decided to book into a bookbinding workshop, this will allow me to see how to bind my book after I have printed, also it will help me to see how many pages I need and how I should lay them out for printing.
The Process;
Get the paper all together, for example using this book I had 3 pages, then fold them in half making sure that you fold towards the grain rather than forcing it to bend the wrong way.
Do this process to all of the pieces of paper that you need for the pages, do this with a bone so that it folds nicely.
Next make sure that you have 6 wholes evenly placed, do this by getting a template the same size as the pages used in the book, in this example we went in 1cm from the edge this is so that we have somewhere to measure from, if you have crop mark you can use those. Then measured 2cm in, and mark it, then two more marks at 1.5cm in.
Put the guide into one of the groups of pages, then poke wholes in the 6 marks, make sure when you do this the group is in a 'v' shape so that they are all in line. Do this to all of the groups.
Start threading the groups individually, start from the outside, then just weave it in and out.
With the next group do the same thing but connect them by threading through the loops on the first group. After you have done this, to make sure it stays tight and together, tie the two ends together.
For the third one do the exact same thing by weaving the thread through the previous loop, then sew it together again at the end making loops and threading it through, then cut off the excess leaving about an inch.
Put the sewed up groups into the wooden thing that holds it together, then start to glue the end together, do a thin layer so that it can dry, then do a second layer and let it dry, stick the ends down so that they don't stick out, then leave it to dry.
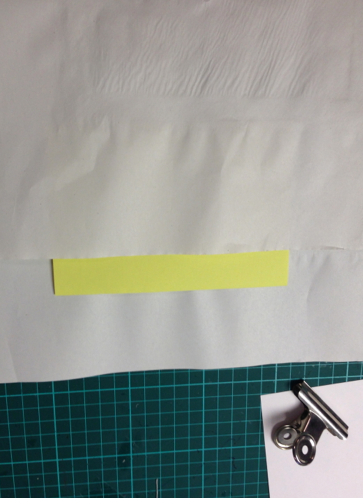
Fold the coloured paper that you want inside the book in half, then glue it to the groups of pages leaving a small gap, do this for both sides.
As the paper has been folded and placed into the groups they go a bit off, therefore it needs cutting down so that the pages are square. To do this you have to use a square ruler to make sure the paper is squared, the pencil them in and using a Stanley knife, cut off all the edges.
To make the hard back book, you start by measuring the cardboard around the grouped pages leaving a small gap, which could be measured by eye or with a spare bit of cardboard, as that should be the space that is left.
After you have done one of the hard backs, then do the next one, using the measurements of the first hard back, making sure that they are both square.
When creating the spine, make sure that the spine is no bigger than the width of the two hard backs with the grouped pages in the middle.
Then use masking tape to map out where each of the backs go with the spine.
Then remove the spine and place on the cover for the book.
After you have done this you have to draw around it, then you can take them away.
When you have the spaces you can stick each of the side on with pva glue.
After you have stuck both of the sides down, flip over the cover then make sure it is stuck down properly, with the bone without marking it. Then go around the edge with the side of the bone, not the top or it will go through the material. Then stick on the spine and do the same.
Cut out the material cover leaving a ruler distance around the cardboard, then make sure when cutting the corners, you leave a few mm so that the corners aren't bare. Then glue and fold up all of the sides starting with the long sides then the shorter sides.
Flip over the cover and make sure that it all looks okay without there being and air bubbles.
This is the hard back.
When gluing the actual book pages into the hard back cover you need to make sure you leave the same gap as you did when you measured it. Do one side at a time using pvs glue and putting newsprint in between the page your gluing and the rest of the pages, so that they don't stick together.
Put the book the press, in between two pieces of board, this will make sure that all of the pages are in properly and the cover is in right.
The Final Book;
The Materials;
There are different materials that can be used for the covers, there are many samples for you to chose from, some of which are water proof and wear proof therefore it will last a lot longer than the other materials. There are also a lot of materials that aren't very durable, but they are really nice, and if you are careful with them they could work really well, but if you get glue on them in the process you will have to start again as you won't be able to get it off.


I am really glad that I have done this process, as it has allowed me to see how the process works, also I have seen how long it takes to bind and how you can't bind within a couple of days of printing using a screen, or 2 weeks of printing using digital methods. This means that I will be able to plan my time better when it comes to printing and binding. I have also seen some examples of books that have been purely screen printed, and this has made me see how effective this process looks and made me more determined to do this for my project.


No comments:
Post a Comment