Illustrator Images;

Links;

Going onto 'Links' it will show me how many images are on my page, and what the image is, when hovering over it with the mouse, that image will form a yellow outline around it. It also shows you all of the information about the image, shows you where is has come from, where you have placed it from.
Saving images;
When placing the images in InDesign that image will always have to be saved and available for InDesign. When deleting the original image, then trying to open my InDesign file again with that image in it, it comes up with this box.


Why?
To keep your InDesign file smaller, it would be too big to work, and would be very hard to work with if the file was larger, therefore uses low resolution previews so that it keeps it more simple, and easier to use. We know how the images look anyway, so we don't need to see its full potential, InDesign is used for arrangements on the page therefore this is all it will be used for.

Resizing an image;


To do this change the document size mode to percentage, then type in the percentage which you want it to be and it will change the size. After changing the size and saving the document, when going back to InDeisgn it will change it.

This is the details of the image, and it now shows that it is 100%, therefore I now know that it has successfully changed.
Frames;
You need to make sure that your not editing text in the text frame. Deselect text frame, then press 'w', this will give you a view of how it is going to look when it is printed, it removed all the guides and edges. But every now and again, click 'w' and you can preiview what it is going to look like.

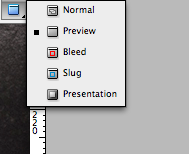
Image on Text;

Select the image then go to 'Window' then 'Text wrap' which comes up with this little box, and you can select text wrap, you can now see in the picture above that if you then move the image all the text will move around it, you can also, using the advanced details, change the spcae around it, less/ more space around the image. You have many option, wrap around object, wrap around bounding box e.t.c.

Going to 'Window' then 'Text wrap' then by selecting wrap around the object then alpha channel, it will make the text go around the object itself.


By selecting 'Text' then making sure the frame is selected and going to 'Type' then selecting 'Fill with placeholder text' it then filled the frame with text. This is an easy process to shape text, or even an image.
Illustrator artwork;
With illustrator unlike photoshop you can just copy and paste artwork from illustrator into indesign, this is because they all work with vectors. It will appear with the full quality, also as its copy and pasting, I don't have any concerns with linked files, this makes my file a lot easier to manage.
Applying colour;
There is a colour palette on the right hand side, which is very similar to photoshop and illustrator. The easiest way to work with colour is by using the swatch palette. You can store colour and apply colour consistently throughout, and they are definitely going to be the same colour. You have to apply colour to a shape or a frame, or outline, working will fill colours or stroke colours.


To fill in the colour you can do it the same as in photoshop and illustrator by selecting the fill and going to swatches and selecting you colour.


Having a colour for the online works in the same way as above, therefore this is how I was able to get a magenta outline of my circle. The text also works in the same way as an image or frame, you can select what ever past of the text you want to be that colour and go to swatches palette.
Swatches;
The swatches palette has very limited preset colours. This is the easiest way to add a colour swatch.

By selecting 'New Colour Swatch...' it will then come up with this box.

Printing;
The print options in InDesign are more complex than other pieces of software, although similar to illustrator.

Saving as a PDF;


No comments:
Post a Comment