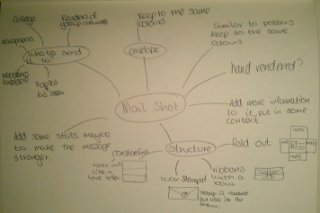
First thoughts;
First thinking about designing a mailshot, envelope and mailing list, I decided I wanted to keep the same colour scheme as my posters, and include more information.
 |
| Brainstorming ideas. |
To start this brief I tried to organise my ideas and get them onto paper, then started showing them visually, seeing what would work most effectively.
Ideas;
 |
| 11 ideas |
These were my 11 initial ideas. Thinking about having something which folds out, not just posters or a leaflet inside and envelope. But then thought about keeping the romantic theme by making the inside like a constantina, as it it was a love letter and it would open that way. Doing this I realised I needed to do more development before deciding on my idea.
Development;
 |
| Constantina, romantic theme. |
 |
| Plain and simple, portrait envelope, posters inside. |
 |
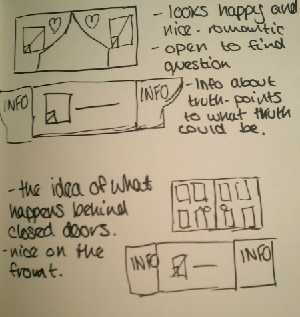
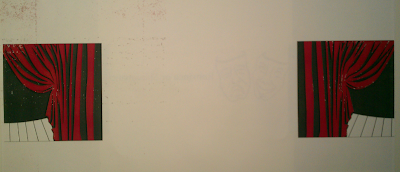
| Show theme, open up to see what happens behind the curtains. |
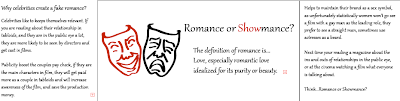
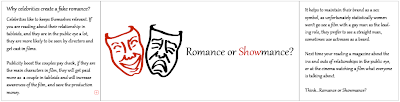
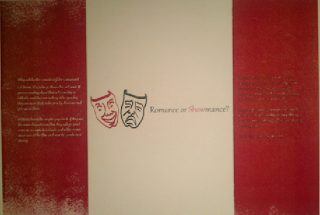
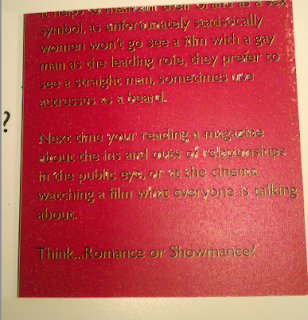
Looking further into it I decided to do the show theme. It is still keeping it simple, but adding information so that people will understand what it is I am trying to show, which is that celebrities take advantage of journalists and tabloids exaggerating the truth to promote films, so they can make more money.
 |
| More detailed development on my idea. |
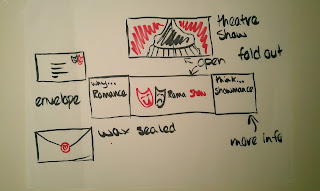
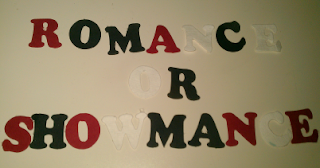
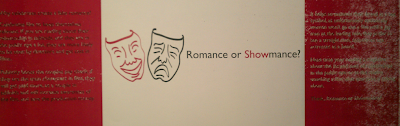
Black, red and the stock as my colours, keeping it consistant throughout this brief so that they all work as a set. Keeping it simple whilst including more information and detail. Keeping the same stock. Deciding on having a wax stamp but not sure of the design yet, needs working on. The show theme will work well as my tagline is 'Romance or Showmance', it will add a visual to the message of show.
 |
| Red, black and white cut out letters. |
I started to think about whether I should make the mailshots by hand or digitally. These letter forms look to be copper black font, therefore wouldn't fit in with my theme, they wouldn't be relevant. Also I have to produce five mailshots, therefore it would be easier if I digitally produced these as I only have a couple of days for this brief.
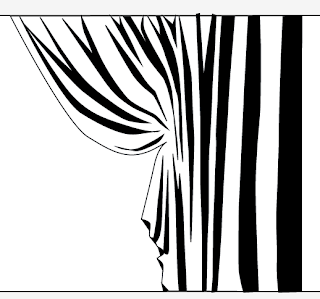 |
| Designing the curtains on illustrator. |
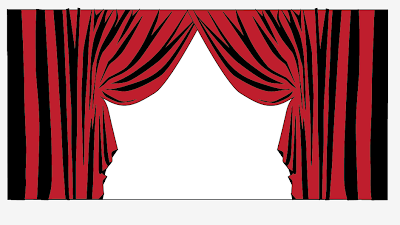 |
| Duplicating them and flipping to make them full. |
 |
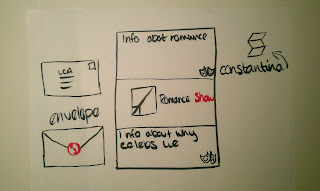
| Having real couples in love on one side and fake showmances on the other. |
 |
| Showing different reasons why couples would lie about being in a relationship, with the definition of romance in the middle. |
 |
| Same as the above but taking away the definition, keeping it simple and matching the posters. |
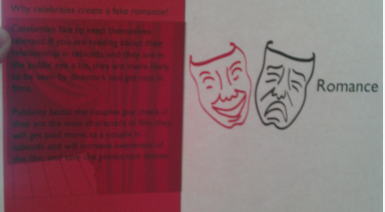
I decided that just showing examples of real romances and shomances would not communicate the message correctly, it may just confuse people. Therefore I decided to use the information about why couples would do this, it shows a lot of information about what I am trying to portray and why I am doing it.
 |
| Adding red to the information section. |
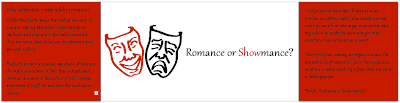
As my envelope is quite plain as I couldn't do it very colourful as it would make my wax stamp less effective. Therefore I decided to add some colour to the inside by turning my information pages red.
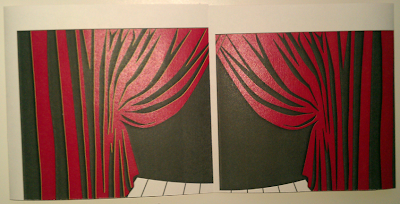
 |
| Front and back of my mailshot. |
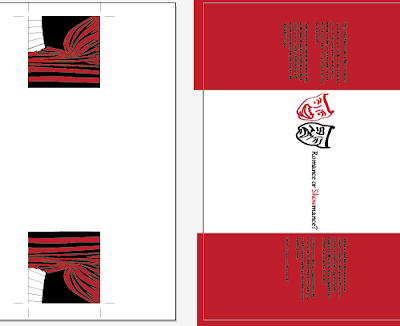 |
| Creating a bleed, as double sided printing is not always accurate. |
To print back to back was difficult to set up but when you know it gets a lot easier. Making a bleed will allow for slight mistake in printing.
Stock;
 |
| Printed on cartridge paper. |
 |
| Close up of cartridge paper print. |
The plan was to use cartridge paper because its just off white, quite
thick and it would work really well as my stock. Also although my
posters were done on printer paper, that was just because of time
issues, and will be printing them out on cartridge. Although these
prints came out really badly, the writing wasn't readable and the block
colours were no longer block, there for had to use printer paper.
Envelope;
 |
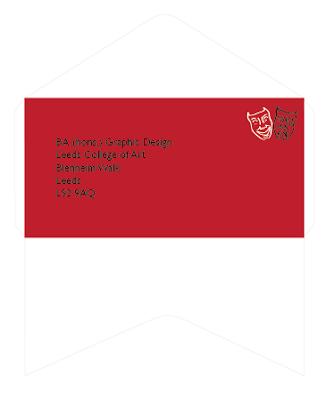
| Envelope design |
This is the envelope design, I thought about making the opacity of the lines 30% so that I can still see the lines but they won't be as visible on the envelope when it has been constructed. The idea behind my envelope is to keep it simple. To show the romance in simplicity, a romantic font on the front with a wax seal on the back, whilst having my mailshot more informal, this is so the people are aware that the envelope and formality of romance is for show, inside it's not the same.
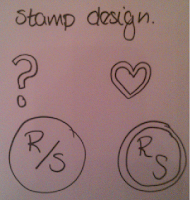 |
| Initial ideas for stamps. |
 |
| Designs on illustrator. |
 |
| Carving from card. |
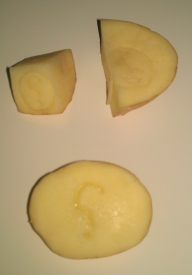 |
| Carving from potatos. |
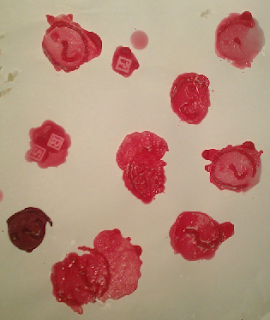 |
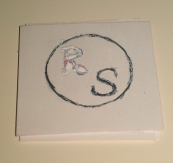
| Experimenting for different stamps and waxes. |
Whilst experimenting with different waxes and stamps, I found that the darker wax resembles the real was steals best. Also the card cut out didn't work therefore had to use a potato, which worked really well. The question mark worked best as in the others it was hard to see the detail.
Final products;
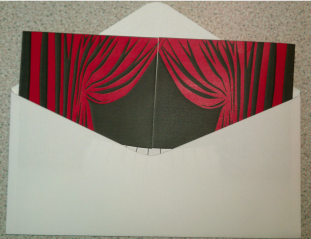 |
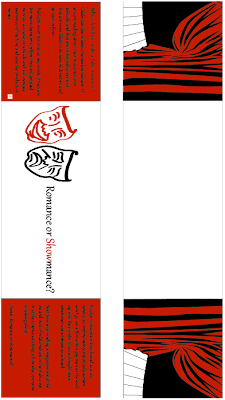
| Mail shot in the envelope. |
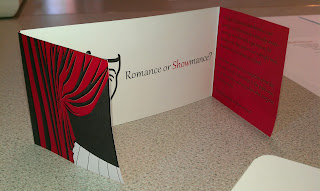 |
| Mailshot. |
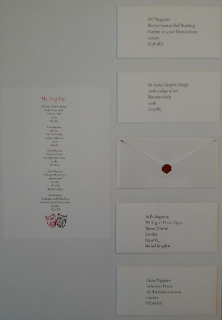 |
| Arrangement for crit. |
Although the stock used was just printer paper, it worked quite well as the colours were most effective, even though they were quite flimsey. If I had more time I would be able to experiment with more stocks so that I would get the density I wanted but for it to still be effective, colourful and crisp.
After crit;
As I was not happy with the quality of my stock, nor was I happy with the overall design as a set. My crit only showed exactly what I was unhappy with in my design, and therefore prompted me to want to change it. I wanted to change the typeface used throughout, especially the body copy. The layout of the mail shot, and add some decorative element to my envelope, because as a set they are look very plain and bland, this was not my intention. Changing both my posters and my mail shots so that they are also as a set and work using the same colours, stock and general theme.
New mail shot;
 |
| Double sided printing, not aligned. |
Printing double sided I found very hard as it shows above its difficult to align the front and back. The colour and finish on this new stock looks really effective, although it didnt print in the correct place, therefore didn't work for me, and had to keep trying.
 |
| Double sided print, rubbing of the ink, as was not dry. |
 |
| Printing on stock rubs the ink off. |
Double sided printing also hindered my print quality. As you couldn't change the setting of the stock being used, and it is toner not ink, it does not stay on the stock very easily. The print is not dry enough when it get sent back through double sided, therefore pulls off all of the ink and it is then difficult to see the words on the page.
 |
| See through, double sided, very off. |
The picture above shows how far out the double sided printing was, and how each time it came out differently, but never correct, as even when I managed to line up the prints, it took off the ink from the other side.
 |
| Stripey ink on stock, from peeling ink off others. |
As Double sided printing was not working for me, I decided to print them off individually and stick them together, although this picture shows, the stripes on the paper from where the ink has stuck to the roller. After doing this I stuck the sheets together using extra thin double sided sticky tape, and it doesn't look very professional, and shows now quality, therefore I tried to get it printed digitally double sided.
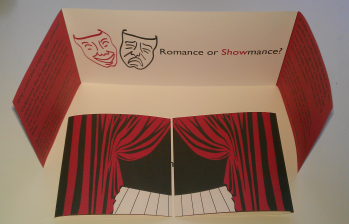 |
| Finished mail shot. |
Printing digitally also took a few times to get the print accurate, but it worked a lot better and looked more professional than the rest of my prints. Although as it has been digitally printed it is slightly a different red as the rest of my set. This is only a subtle difference but you can tell, this is because it has been printed with ink rather than toner.
 |
| Envelope development. |
I decided to develop the envelope slightly more, as before it looked very plain and too simple, it looked slightly dull. By adding red to just the front of my envelope, it won't effect my wax seal, but adds something extra to my design, and still keeping it simple at the same time. Also applying the theatre faces to where the stamp would be gives it a place for the stamp, but also makes it aesthetically pleasing.
 |
| Old envelope and new envelope. |
Showing both envelopes together shows just how much of a difference is made by slightly changing the layout and colour. Although I think what makes it much better is the fact that I changed the typeface, it has made all the difference, also using quality stock allows the product to be a higher quality.
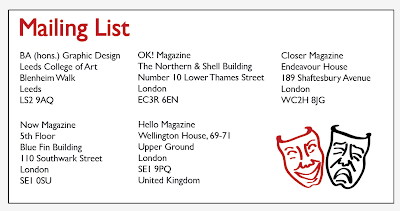 |
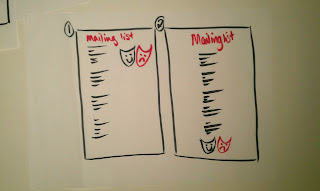
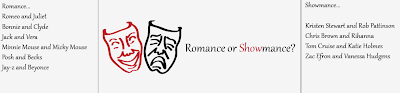
| New mailing list. |
This was my initial design for my mail shot, although it didn't work before as the typeface is now Gill Sans, and before it was Gabriola. Before it looked to cluttered, it wasn't legible and looked really childlike. This on the other hand has a more effective layout, typeface and use of image.
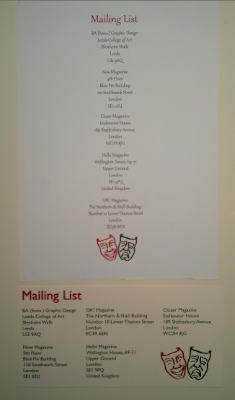 |
| New mailing list and old mailing list. |
Comparing the old and new mailing list shows how inappropriate the original mailing list was. I agree with the people who critted my work, when they said that it looks like a posh food menu, and it definitely isn't suitable for my audience.
Evaluation;
This brief I changed many times, looking back on the original message and delivery brief, I should have chosen an article which has more depth. An article which has statistics and facts to use, rather than an opinion. Saying that I enjoyed the light heartedness of these briefs.
Changing my original designs has helped to communicate my message of awareness, although there is lots of things which I would change about this if I had more time. I would like the colour to be identicle to the colour I have used throughout as I believe it is strong and attracts attention, although I know that it is set as the same colour, it is purely the print quality. To improve these mail shots and envelopes I need to work on my crafting skills, as when sticking the individual mail shots together, I found that crafting is something I lack skills in.
Re-doing this brief over I would have considered stock a lot more, and how colours print differently to what they look like on screen. I also would have done more development work so that I can find my best design before I start printing. But overall I am a lot happier with my new mail shots and mailing lists, they work better and are a lot more effective.


No comments:
Post a Comment